Creating an exhibition model that captures attention requires precision, creativity, and a deep understanding of scale and design. Whether you’re building in 1:50, 1:100, or 1:200 scale, the exhibition model must convey architectural details clearly and attractively. An exibition model serves not only as a visual representation but also as a communication tool between designers, clients, and stakeholders. In the early stages, a white exibition model helps to outline structure and form. However, transforming a plain exhibition model into a colorful and detailed one adds life and realism. Crafting an exhibition model requires materials selection, accurate scaling, and artistic skill. The exhibition model you present must align with your project’s vision and purpose. Each exhibition model should highlight the layout, environment, and spatial relationships clearly. Whether for real estate, architecture, or urban planning, the exhibition model plays a critical role in presenting ideas. Ultimately, a well-executed exhibition model becomes the star of the display, drawing viewers in with both clarity and charm.
Understanding Scale: 1:50, 1:100, and 1:200
Why Scale Matters in Your Exhibition Model
One of the most important decisions when creating an exhibition model is selecting the right scale. A 1:50 exhibition model is best for detailed interiors and furniture arrangements. This scale offers viewers a closer look at how spaces function and flow. A 1:100 exhibition model balances detail with a broader overview, ideal for showcasing entire floors or building shells. Meanwhile, a 1:200 exhibition model is excellent for contextualizing buildings in a neighborhood or landscape, perfect for urban planning.
Each scale affects how much detail can be included in your exibition model. For instance, intricate railings and fixtures might be feasible in 1:50 but overly delicate for 1:200. Choosing the right scale ensures your exhibition model communicates the intended message while staying practical and durable.
From White to Color: Transitioning Your Model
The Role of the White Exhibition Model
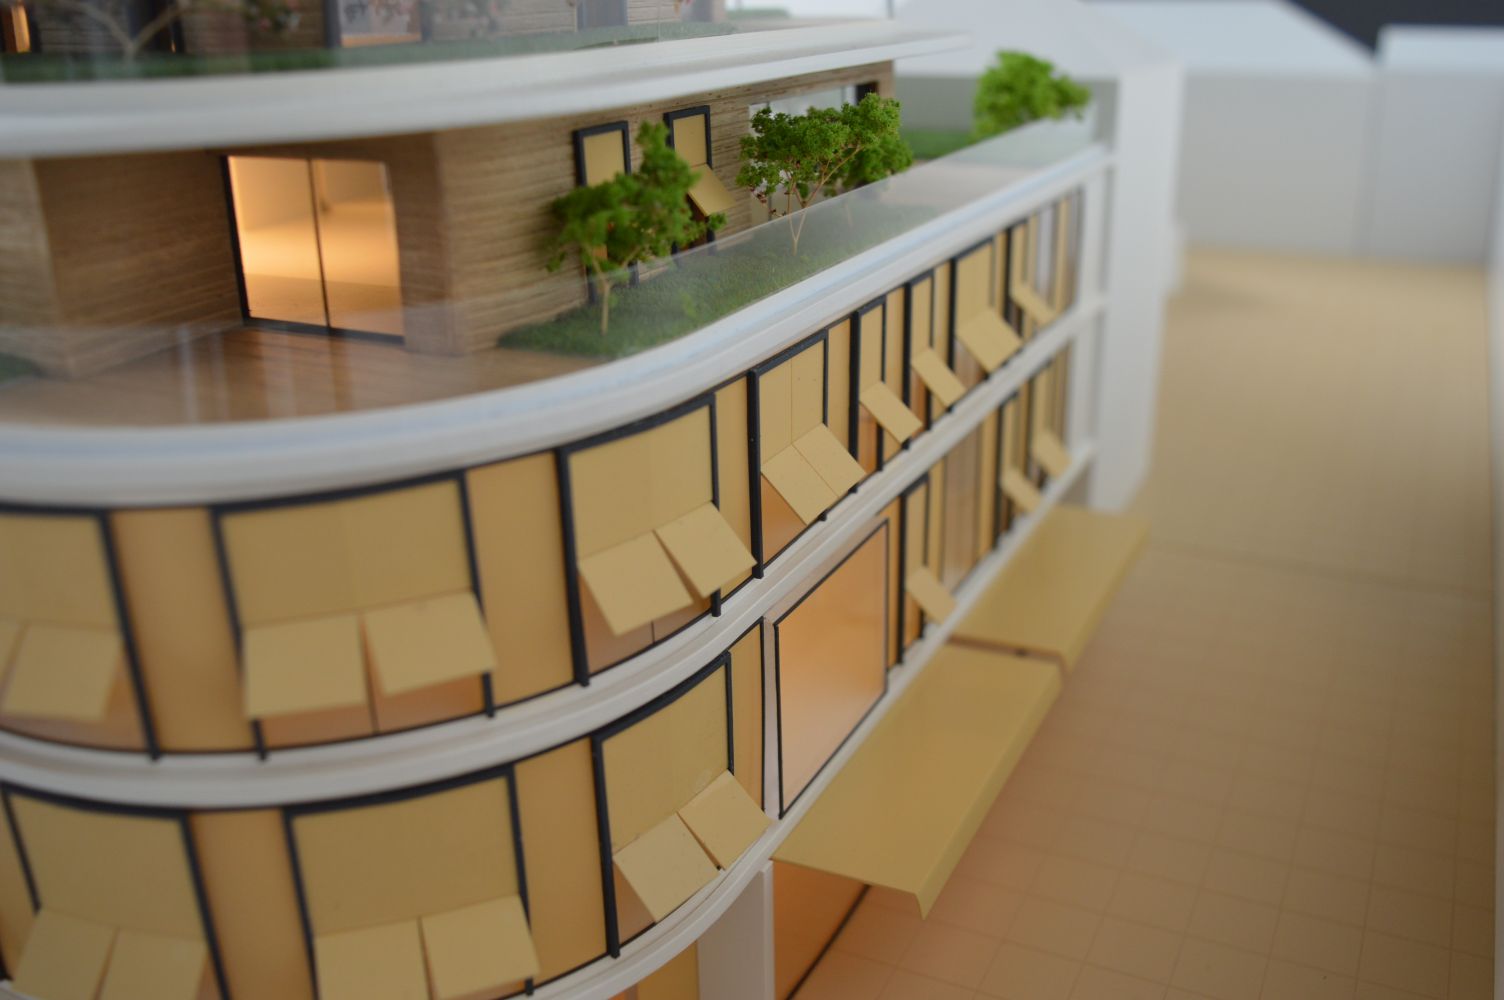
A white exhibition model acts as a blank canvas. It focuses attention on form, massing, and spatial layout without the distraction of color or texture. Many architects begin with a white exhibition model to refine the physical footprint of the project. The simplicity allows teams to visualize zoning, height, and proportions effectively.
However, while a white exhibition model serves its early purpose well, it lacks the emotional connection that color can provide. Adding color to your exhibition model transforms it from abstract to relatable. Viewers can imagine themselves within the space, enhancing understanding and engagement.
Adding Color and Realism
Bringing your exhibition model to life with color adds depth, context, and character. Consider using muted tones for buildings and natural hues for landscapes. Roads, trees, water features, and lighting can all enrich the exhibition model. Materials such as acrylic, foam, wood, and 3D-printed elements help you bring vibrancy without sacrificing precision.
Color also highlights different zones and functions within your exhibition model. For example, residential areas might use warm tones, while commercial zones employ cooler shades. These cues guide the viewer’s interpretation and make your exibition model more intuitive.
Tools and Materials for Model Crafting
Choosing the Right Materials
The success of your exhibition model depends heavily on material selection. Foam boards are ideal for quick, inexpensive mockups, while acrylic sheets offer transparency and clean edges. Balsa wood adds a natural texture and is easy to shape. For more durability, consider 3D printing components to maintain scale accuracy.
Each material affects how your exhibition model appears and how long it lasts. Think about where and how often the exhibition model will be displayed. Durability and transportability should influence your choice.
Essential Tools for Precision
Craft knives, laser cutters, and 3D printers are essential for constructing an accurate exhibition model. Laser cutters provide precision for repetitive elements, while 3D printers help create complex geometry. You’ll also need adhesives, sanding tools, and paint for finishing touches. These tools ensure your exhibition model is built to professional standards.
Final Touches: Presentation and Display
Enhancing the Viewer Experience
An exhibition model is more than just a static display—it’s part of an interactive storytelling process. Place the exhibition model on a well-lit stand to highlight key features. Add removable roof sections or cutaways for interior viewing. Include signage and labels for scale, function, and orientation.
Lighting can elevate your exhibition model significantly. Miniature LED lights simulate real illumination and help focus viewer attention on important areas. Consider the flow of foot traffic and make sure your exhibition model is visible from multiple angles.
Digital and Physical Integration
In today’s hybrid environment, combining your exhibition model with digital elements enhances its value. Use augmented reality (AR) or QR codes so viewers can scan the exhibition model for more information. Integrating the exhibition model into a digital presentation can extend its reach beyond the exhibit floor.
Conclusion: The Power of a Thoughtfully Crafted Exhibition Model
From concept to completion, a thoughtfully designed exhibition model speaks volumes. It begins as a white structural sketch and evolves into a colorful, detailed representation that connects people to ideas. Whether at 1:50, 1:100, or 1:200 scale, your exhibition model should be accurate, engaging, and professionally finished. Every element—from the materials to the presentation—must work together to support the message behind the exhibition model. A great exhibition model doesn’t just reflect a project; it brings it to life, capturing the imagination of clients, investors, and the general public alike.